Subway tiles, renowned for their classic charm and versatility, are an exceptional choice for bathroom floors. From traditional herringbone patterns to modern stacked layouts, subway tiles offer endless design possibilities. Their durability and ease of maintenance make them a practical and stylish option for any bathroom.
In this comprehensive guide, we will explore the myriad of subway tile bathroom floor ideas, delving into design considerations, tile materials and finishes, installation tips, and maintenance advice. Prepare to be inspired as we showcase a gallery of stunning subway tile bathroom floor designs that will elevate your bathroom’s aesthetic.
Introduction
Subway tiles have become increasingly popular for bathroom floors due to their timeless design and versatility. These rectangular tiles, typically measuring 3×6 inches, offer a classic aesthetic that complements various bathroom styles.Subway tiles on bathroom floors provide several advantages. Their smooth, non-porous surface is easy to clean and maintain, making them a practical choice for busy bathrooms.
The tiles are also durable and can withstand heavy foot traffic, ensuring longevity. Moreover, subway tiles come in a wide range of colors and finishes, allowing for customization to suit different tastes and décor.
Drawbacks
Despite their advantages, subway tiles on bathroom floors may have some drawbacks. The grout lines between the tiles can accumulate dirt and grime, requiring regular cleaning to maintain a pristine appearance. Additionally, the smooth surface of subway tiles can be slippery when wet, especially if not paired with an anti-slip finish or texture.
Design Considerations
Subway tiles on bathroom floors offer versatility and timeless appeal. Consider the following design elements to elevate your space:
Layout Patterns
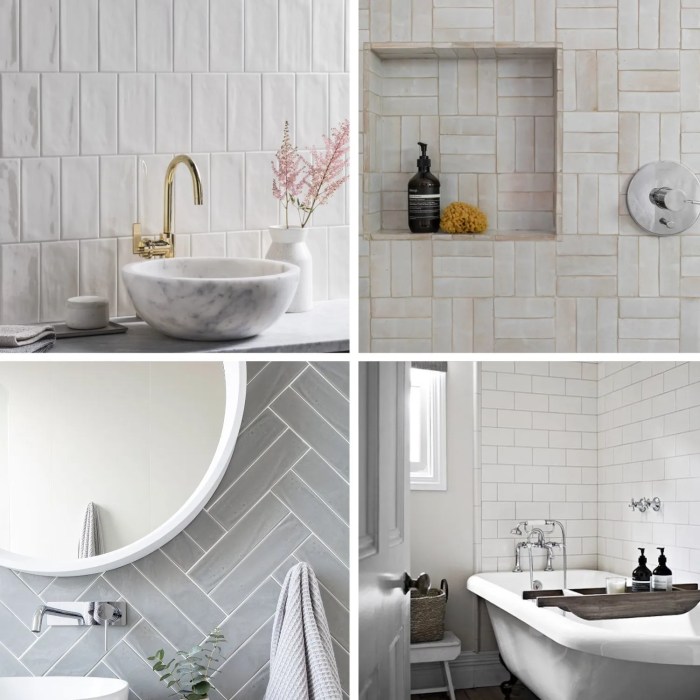
Experiment with different layout patterns to create visual interest. Herringbone and offset brickwork are classic choices, while basketweave and pinwheel add a touch of sophistication. For a more contemporary look, try a stacked bond pattern, where tiles are aligned vertically or horizontally.
Grout Color and Width
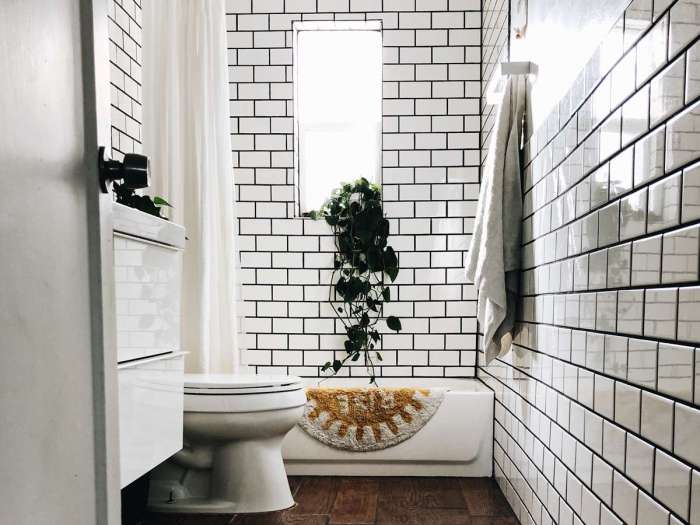
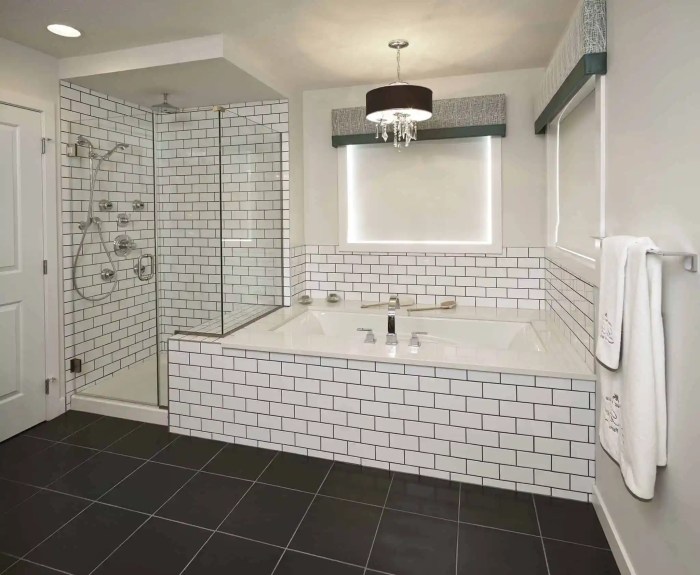
Grout color and width significantly impact the overall look of your floor. Darker grout colors, such as black or gray, create a bold contrast that highlights the tiles. Lighter grout colors, like white or beige, blend seamlessly, resulting in a more subtle and cohesive appearance.
Grout width can also be adjusted to achieve different effects; wider grout lines create a more rustic feel, while narrower lines provide a more polished look.
Accent Tiles and Borders
Incorporate accent tiles or borders to add a touch of drama or personality to your floor. Accent tiles can be used to create focal points or highlight specific areas, such as the shower or vanity. Borders can frame the floor and add a touch of elegance.
Tile Materials and Finishes
Subway tiles are available in a wide range of materials, each with its unique characteristics and benefits.
- Ceramic: Ceramic subway tiles are made from clay and fired at high temperatures. They are durable, easy to clean, and available in a wide variety of colors and finishes.
- Porcelain: Porcelain subway tiles are made from a finer clay than ceramic tiles and fired at even higher temperatures. This results in a tile that is more durable, denser, and less porous than ceramic tiles.
- Glass: Glass subway tiles are made from tempered glass. They are non-porous, stain-resistant, and available in a wide variety of colors and finishes.
In addition to the material, the finish of the subway tile can also impact the overall design.
- Matte: Matte subway tiles have a flat, non-reflective finish. They are a good choice for creating a classic or rustic look.
- Glossy: Glossy subway tiles have a shiny, reflective finish. They are a good choice for creating a more modern or glamorous look.
- Textured: Textured subway tiles have a raised or embossed pattern. They are a good choice for creating a more unique or eye-catching look.
The size and shape of the subway tile can also affect the overall design.
- Standard subway tiles: Standard subway tiles are typically 3 inches by 6 inches in size. They are a good choice for creating a classic or traditional look.
- Large subway tiles: Large subway tiles are typically 4 inches by 12 inches in size. They are a good choice for creating a more modern or spacious look.
- Small subway tiles: Small subway tiles are typically 2 inches by 4 inches in size. They are a good choice for creating a more unique or intricate look.
Installation Tips
Installing subway tiles on bathroom floors requires meticulous attention to detail. By following these step-by-step instructions and incorporating helpful tips, you can achieve a professional-looking finish that will enhance the aesthetics of your bathroom for years to come.
To ensure a smooth and successful installation process, gather the necessary tools and materials, including subway tiles, thin-set mortar, grout, spacers, a notched trowel, a level, a tile cutter, and a sponge or float.
Preparing the Floor
- Ensure that the bathroom floor is level, clean, and free of any debris or imperfections.
- If the existing floor is uneven, consider using a self-leveling compound to create a smooth surface for tile installation.
Applying Thin-set Mortar
- Spread a thin layer of thin-set mortar onto the floor using a notched trowel.
- Hold the trowel at a 45-degree angle and apply the mortar in straight, even rows, covering approximately 1 square foot at a time.
Laying the Tiles
- Carefully place the first tile onto the thin-set mortar, ensuring it is level and aligned with the desired pattern.
- Insert spacers between the tiles to maintain consistent spacing and prevent them from shifting during installation.
- Use a level to check the tiles regularly to ensure they are perfectly level.
Cutting Tiles
- For areas where full tiles cannot be used, measure and mark the tiles that need to be cut.
- Use a tile cutter to make precise cuts, following the manufacturer’s instructions.
Grouting and Sealing
- Once the tiles are laid, allow the thin-set mortar to cure for 24 hours.
- Apply grout to the joints between the tiles using a grout float or sponge.
- Use a damp sponge to remove excess grout and smooth the surface.
- Allow the grout to dry completely before sealing it with a water-resistant sealant.
Maintenance and Cleaning
Maintaining subway tile bathroom floors is crucial for preserving their pristine appearance and ensuring durability. Regular cleaning and proper maintenance can prevent stains, damage, and the accumulation of dirt and grime.
To effectively clean subway tile floors, follow these steps:
- Sweep or vacuum the floor to remove loose debris and dust.
- Mix a solution of warm water and a pH-neutral cleaner specifically designed for ceramic or porcelain tiles.
- Use a mop or sponge to apply the solution to the floor, ensuring even coverage.
- Scrub the tiles gently with a soft-bristled brush or microfiber cloth to remove dirt and grime.
- Rinse the floor thoroughly with clean water to remove any remaining cleaning solution.
- Dry the floor with a clean towel or squeegee to prevent water spots.
Removing Stains
For stubborn stains, use a commercial stain remover specifically formulated for ceramic or porcelain tiles. Follow the manufacturer’s instructions carefully and test the solution in an inconspicuous area before applying it to the entire floor.
Preventing Damage
To prevent damage to subway tile floors, follow these tips:
- Use soft-bristled brushes or microfiber cloths when cleaning to avoid scratching the tiles.
- Avoid using harsh chemicals or abrasive cleaners, as they can damage the tile surface.
- Seal the tiles with a penetrating sealer to protect them from stains and moisture.
li>Place rugs or mats in areas with high foot traffic to protect the tiles from wear and tear.
Inspiration and Examples
Discover a gallery of captivating subway tile bathroom floor ideas that showcase the versatility and beauty of this classic design element.
These inspiring images illustrate diverse design styles, color combinations, and material choices, providing endless possibilities for creating a unique and stylish bathroom floor.
Design Gallery
- Modern Minimalism: A sleek and contemporary bathroom featuring crisp white subway tiles arranged in a classic brick pattern, complemented by sleek black fixtures and a floating vanity.
- Bohemian Chic: A vibrant and eclectic bathroom adorned with colorful patterned subway tiles in shades of blue, green, and yellow, paired with vintage-inspired brass fixtures and a woven rug.
- Industrial Charm: A loft-style bathroom with dark gray subway tiles laid in a herringbone pattern, creating a rugged and masculine aesthetic, complemented by exposed brick walls and metal accents.
- Scandinavian Simplicity: A serene and inviting bathroom featuring pale gray subway tiles with a subtle glossy finish, paired with natural wood accents and a cozy woven bathmat.
- Coastal Getaway: A beach-inspired bathroom with light blue subway tiles arranged in a chevron pattern, reminiscent of ocean waves, complemented by woven baskets and nautical-themed décor.
Summary
Subway tiles continue to reign as a timeless and versatile flooring solution for bathrooms. Whether you seek a classic or contemporary aesthetic, the design possibilities are boundless. With careful consideration of layout patterns, grout colors, and accent tiles, you can create a bathroom floor that reflects your unique style.
Remember, proper installation and maintenance will ensure the longevity and beauty of your subway tile floor for years to come.


