Creating a harmonious flow between your bathroom and hallway flooring can elevate the aesthetics of your home while enhancing functionality. This guide will provide you with comprehensive tips and insights to ensure a seamless transition between these two spaces, resulting in a cohesive and visually appealing living environment.
From selecting the most suitable flooring materials to employing effective installation techniques, we will delve into the intricacies of creating a smooth and visually pleasing transition. Whether you prefer the classic elegance of ceramic tiles or the warmth of hardwood, this guide will empower you to make informed decisions and achieve a stunning transformation in your home.
Leveling and Preparation
Ensuring a smooth transition between bathroom and hallway flooring requires proper leveling and preparation of the subfloor. This step is crucial for a seamless installation and to prevent potential issues such as uneven surfaces, buckling, or cracking.
To level the subfloor, you may need to use leveling compounds or underlayment. Leveling compounds are self-leveling materials that can fill in uneven areas, while underlayment provides a cushioning layer between the subfloor and the new flooring.
Moisture Barriers
In areas like bathrooms, where moisture is prevalent, installing a moisture barrier is essential to prevent water damage. Moisture barriers can be sheets of plastic or rubber that are placed between the subfloor and the new flooring to prevent moisture from seeping through.
Installation Techniques
The installation process for bathroom and hallway flooring involves meticulous attention to detail, particularly in the transition area where the two surfaces meet. To ensure a seamless and durable transition, follow these detailed steps for cutting, laying, and grouting.
Cutting
Precise cutting is crucial for a clean and flush transition. Measure and mark the flooring materials carefully before using a sharp utility knife or a power saw to make clean, straight cuts. Ensure that the cuts are perpendicular to the floor surface to create a tight fit during installation.
Laying
Begin laying the bathroom flooring first, working your way towards the transition area. Spread an appropriate amount of thin-set mortar onto the subfloor and use a notched trowel to create ridges. Carefully place the tiles or planks onto the mortar, pressing down firmly to ensure proper adhesion.
Repeat this process for the hallway flooring, leaving a small gap at the transition point.
Transition Area
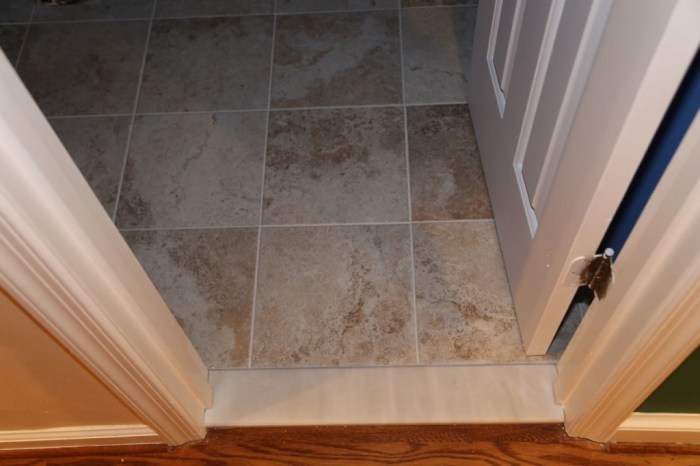
For the transition area, use a transition strip or molding to create a smooth and visually appealing connection between the two flooring materials. Install the transition strip using appropriate fasteners or adhesive, ensuring it is level with both the bathroom and hallway flooring.
Grouting
Once the flooring is laid, apply grout to the joints between the tiles or planks. Use a grout float to press the grout into the gaps, ensuring it is level with the surface. Wipe away any excess grout and allow it to dry completely.
Seal the grout to protect it from moisture and stains.
Grouting and Sealing
Grouting and sealing are crucial steps in completing a seamless transition from bathroom to hallway flooring. These processes ensure a durable, waterproof, and aesthetically pleasing finish.
After the tiles or planks are installed, grout is applied to fill the gaps between them. The grout color should complement the tiles and the overall design scheme. For a durable and waterproof finish, choose a high-quality grout that is resistant to stains and moisture.
Sealant Selection
Once the grout has cured, a sealant is applied to protect it from water and stains. Sealants come in various finishes, including matte, glossy, and satin. Choose a sealant that matches the grout color and the desired sheen.
Applying the sealant is a straightforward process. Use a clean cloth or sponge to apply the sealant evenly over the grout lines. Allow the sealant to dry completely before walking on the floor or using the shower.
Regularly resealing the grout and sealant will ensure the longevity of your bathroom and hallway flooring.
Design Considerations
The transition between bathroom and hallway flooring is a crucial design element that can significantly impact the overall aesthetics and functionality of both spaces. It’s essential to consider the following factors when selecting and installing flooring:
Matching Colors, Patterns, and Textures
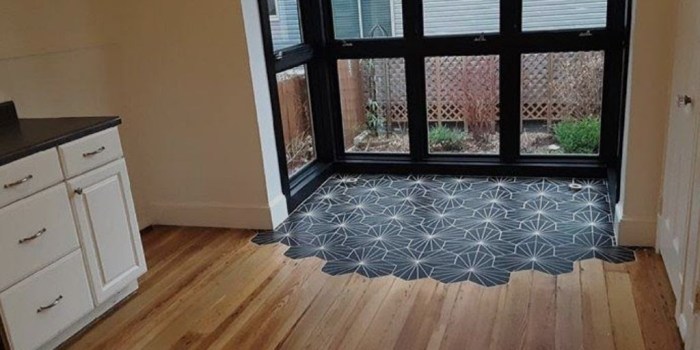
Matching the colors, patterns, and textures of the bathroom and hallway flooring can create a cohesive and visually appealing space. For instance, using a similar color palette for both areas will create a sense of continuity, while incorporating contrasting patterns or textures can add interest and depth.
Final Summary
By following the expert tips Artikeld in this guide, you can effortlessly achieve a seamless transition from bathroom to hallway flooring. Remember to consider the overall design scheme, prioritize durability and water resistance, and pay meticulous attention to leveling and preparation.
With careful planning and execution, you can create a visually cohesive and functional space that will enhance the beauty and comfort of your home for years to come.


