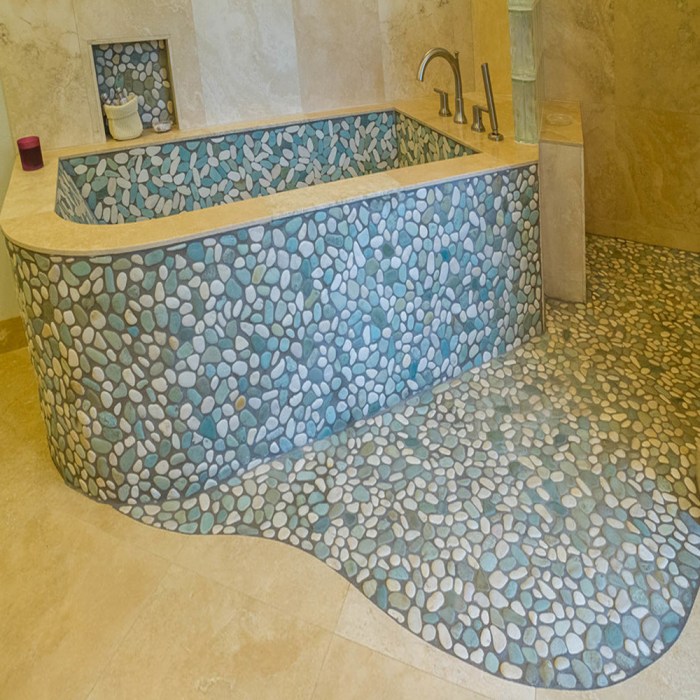
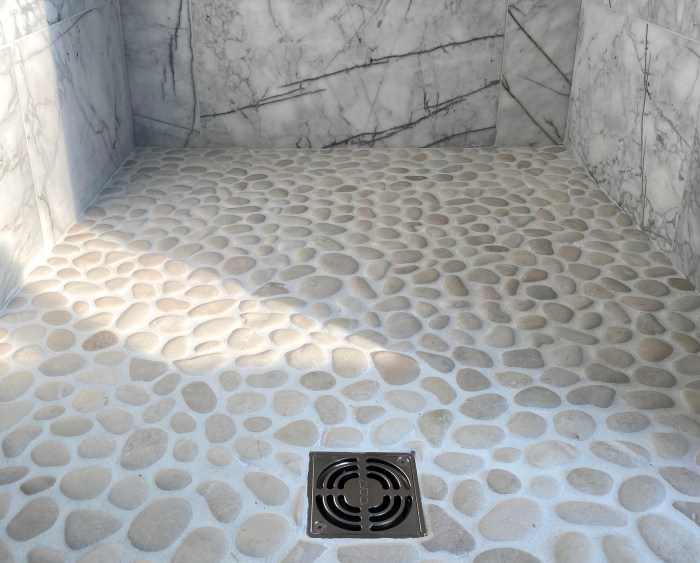
Pebble bathroom floors are a stylish and durable choice that can add a touch of luxury to your home. But installing a pebble bathroom floor can be a challenging task, so it’s important to do your research and prepare properly.
In this guide, we’ll walk you through the entire process of laying a pebble bathroom floor, from preparing the floor to grouting and sealing. We’ll also provide tips on choosing the right pebbles and creating a beautiful design.
Materials and Tools
Laying a pebble bathroom floor requires a specific set of materials and tools to ensure a successful and durable installation. Understanding the purpose and usage of each component is crucial for a flawless outcome.
Essential Materials
- Pebbles: Smooth, rounded stones used to create the flooring surface.
- Thinset Mortar: An adhesive used to bond the pebbles to the subfloor.
- Grout: A paste used to fill the spaces between the pebbles.
- Sealant: A protective coating applied after grouting to prevent water damage.
Necessary Tools
- Trowel: A flat, rectangular tool used to apply thinset mortar.
- Grout Float: A rubber or plastic tool used to spread and smooth grout.
- Sponge: Used to clean excess thinset or grout.
- Safety Glasses: To protect eyes from flying debris.
- Knee Pads: To provide comfort while working on the floor.
li> Bucket: To hold thinset mortar, grout, or water.
Specialized Equipment
- Pebble Tile Saw: A specialized saw used to cut pebbles to the desired size and shape.
- Grout Sealer Applicator: A tool designed to apply sealant evenly to the grout.
Floor Preparation

Before installing pebble tiles, the bathroom floor must be properly prepared to ensure a strong and durable foundation.
This involves assessing the existing floor’s condition, removing any old flooring, creating a level surface, and waterproofing the floor.
Begin by inspecting the floor for any damage, such as cracks or unevenness. If the floor is in poor condition, it may need to be repaired or replaced before installing the pebbles.
Removing Old Flooring
If there is old flooring on the bathroom floor, it must be removed before installing the pebbles. This can be done using a variety of tools, such as a pry bar or a hammer and chisel. Once the old flooring has been removed, the subfloor should be inspected for any damage and repaired if necessary.
Creating a Level Surface
The bathroom floor must be level before installing the pebbles. This can be done using a self-leveling compound or by shimming the subfloor with plywood or cement board. Once the floor is level, it should be allowed to dry completely before proceeding.
Waterproofing the Floor
The bathroom floor must be waterproofed before installing the pebbles. This can be done by applying a waterproof membrane to the floor. The membrane should be installed according to the manufacturer’s instructions.
Installing a Moisture Barrier
In addition to waterproofing the floor, it is also important to install a moisture barrier. This will help to prevent moisture from seeping up through the floor and damaging the pebbles. The moisture barrier should be installed according to the manufacturer’s instructions.
Pebble Selection and Layout
When selecting pebbles for your bathroom floor, consider their type, size, color, and texture. Natural pebbles offer a unique and organic look, while tumbled pebbles have a smoother, more uniform surface. For a more rustic feel, choose larger pebbles; for a more elegant look, opt for smaller ones.
Consider the color of the pebbles in relation to the rest of your bathroom decor. Lighter pebbles create a brighter, more spacious feel, while darker pebbles add depth and drama. The texture of the pebbles can also impact the overall look and feel of the floor.
Smooth pebbles are easier to clean and maintain, while rougher pebbles provide a more tactile experience.
Layout and Design
Once you have chosen your pebbles, it’s time to create a layout and design for your floor. Start by sketching out the overall shape and size of the floor. Then, decide on a pattern for the pebbles. Popular patterns include random, herringbone, and mosaic.
You can also create borders or accents using different colors or sizes of pebbles.When laying out the pebbles, start from the center of the floor and work your way outwards. Use a level to ensure that the pebbles are laid flat and evenly.
Once the pebbles are in place, grout them using a cement-based grout. Allow the grout to dry completely before sealing the floor with a penetrating sealer. This will help to protect the floor from moisture and stains.
Pebble Installation
Installing pebbles onto a bathroom floor requires meticulous attention to detail and precision. Several methods are commonly employed, each with its own advantages and techniques. This section will delve into the processes of dry-laying, wet-setting, and using mesh backing, providing step-by-step instructions for each method.
Dry-Laying
Dry-laying involves arranging pebbles on the floor without using any adhesive or mortar. This method is ideal for creating intricate patterns or designs and allows for easy adjustments before final placement.
- Prepare the floor by leveling and smoothing the surface.
- Spread a layer of sand or pea gravel over the floor to provide a stable base.
- Arrange the pebbles on the sand, creating the desired pattern or design.
- Once satisfied with the layout, gently tap the pebbles into the sand to secure them.
Wet-Setting
Wet-setting is the traditional method of installing pebbles, using thinset mortar to adhere them to the floor. This method provides a more permanent and durable bond, suitable for high-traffic areas.
- Prepare the floor by cleaning and leveling the surface.
- Apply a layer of thinset mortar to the floor using a notched trowel.
- Place the pebbles into the mortar, pressing them down firmly to ensure adhesion.
- Allow the mortar to set for the recommended time before grouting.
Using Mesh Backing
Mesh backing is a flexible material that helps keep pebbles in place during installation and grouting. This method is particularly useful for rounded or irregular-shaped pebbles.
- Prepare the floor as for wet-setting.
- Cut the mesh backing to the desired size and shape.
- Apply thinset mortar to the floor and place the mesh backing on top.
- Press the pebbles into the mortar through the mesh backing, ensuring they are evenly distributed.
- Allow the mortar to set before grouting.
Grouting and Sealing
Grouting and sealing are essential steps in completing a pebble bathroom floor. Grout fills the spaces between the pebbles, while sealant protects the grout and pebbles from moisture and stains.
When choosing grout, consider the size and shape of your pebbles. For small pebbles, use a fine-grained grout. For larger pebbles, use a coarse-grained grout.
Grout Preparation and Application
- Mix the grout according to the manufacturer’s instructions.
- Apply the grout to the floor using a grout float.
- Work the grout into the spaces between the pebbles.
- Remove any excess grout from the surface of the pebbles.
Sealing the Pebble Floor
Once the grout has cured, seal the floor using a penetrating sealer. This will protect the grout and pebbles from moisture and stains.
When choosing a sealer, consider the type of pebbles you have. Some sealers are specifically designed for use on natural stone.
Maintenance and Care
Maintaining a pebble bathroom floor is crucial to preserve its beauty and longevity. Proper care involves regular cleaning, stain prevention, and occasional resealing.
Cleaning and Stain Prevention
- Sweep or vacuum the floor regularly to remove loose dirt and debris.
- Use a mild, pH-neutral cleaner specifically designed for stone floors. Avoid harsh chemicals or abrasive cleaners.
- Clean spills and stains immediately using a damp cloth or sponge. Blot up the stain and rinse the area thoroughly with clean water.
- Prevent stains by applying a penetrating sealer to the floor after installation and resealing it every 1-2 years.
Closure
With a little planning and preparation, you can lay a pebble bathroom floor that will be both beautiful and durable. So what are you waiting for? Get started today!


