Remodeling a bathroom can be a daunting task, but with the right knowledge and preparation, it can be a rewarding experience. One of the most important aspects of a bathroom remodel is the flooring. Bathroom floor tiles are not only a matter of aesthetics but also play a vital role in the functionality and durability of the space.
In this comprehensive guide, we will walk you through the entire process of removing and replacing bathroom floor tiles, from safety precautions to the final finishing touches. We will cover everything you need to know, from choosing the right tiles to installing them like a pro.
So, whether you are a seasoned DIY enthusiast or a complete novice, this guide will provide you with all the information you need to tackle this project with confidence.
Removing Bathroom Floor Tiles
Before beginning, ensure your safety by wearing gloves, safety glasses, and a dust mask. Gather the necessary tools: a pry bar, hammer, chisel, and bucket.
Removing Tiles
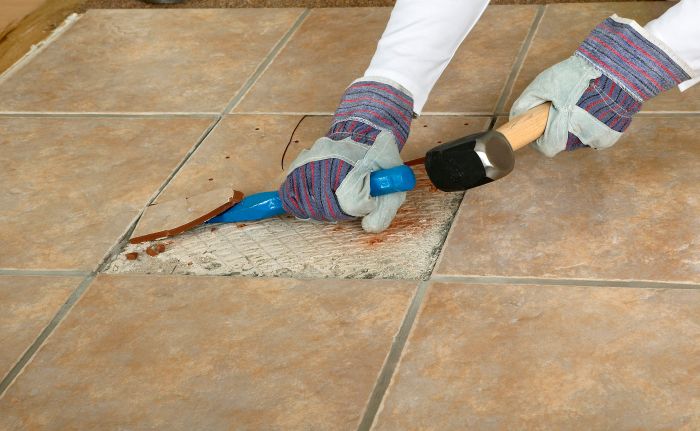
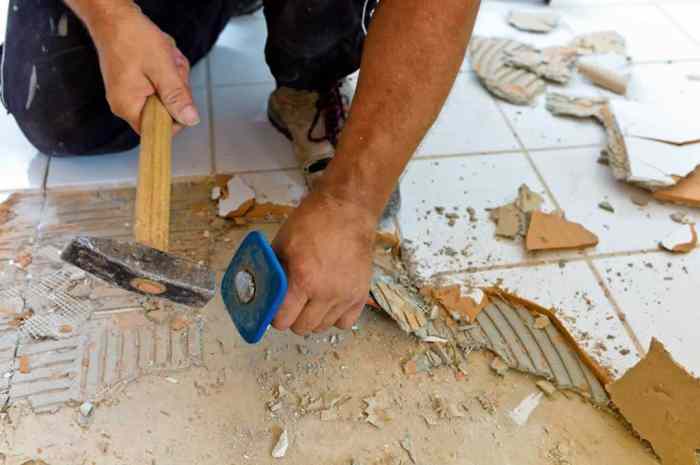
Start by removing any fixtures or appliances on the floor. Use the pry bar to gently lift a corner of a tile. Insert the chisel and hammer to break the tile loose. Continue removing tiles, working your way across the floor.
Place the removed tiles in the bucket.
Preparing the Subfloor
Before installing new bathroom floor tiles, it’s essential to ensure that the subfloor is in good condition. The subfloor provides support and stability for the tiles, and any damage or unevenness can compromise the installation and longevity of the new tiles.
Inspecting the Subfloor for Damage
Thoroughly inspect the subfloor for any signs of damage, such as cracks, holes, or water damage. Use a flashlight to illuminate any areas that may be difficult to see.
- Cracks: Cracks in the subfloor can weaken the structure and allow moisture to penetrate, leading to further damage.
- Holes: Holes in the subfloor can provide a hiding place for pests and allow moisture to enter, causing rot and mold.
- Water damage: Water damage can cause the subfloor to swell and weaken, making it unsuitable for tile installation.
Repairing or Replacing Damaged Subflooring
If any damage is found, it’s important to repair or replace the affected area before installing new tiles. The type of repair or replacement required will depend on the severity of the damage.
- Small cracks: Small cracks can be filled with a patching compound or epoxy resin.
- Large cracks: Large cracks may require cutting out the damaged section and replacing it with a new piece of subflooring.
- Holes: Holes can be patched with a piece of plywood or another suitable material, and secured with screws or nails.
- Water damage: Water-damaged subflooring should be removed and replaced with new, dry material.
Leveling the Subfloor
Once any damage has been repaired, it’s important to level the subfloor to ensure that the new tiles are installed evenly and securely. This can be done using a self-leveling compound or a combination of shims and leveling mortar.
- Self-leveling compound: Self-leveling compound is a liquid that can be poured over the subfloor to create a smooth, level surface.
- Shims and leveling mortar: Shims are thin pieces of material that can be placed under the tiles to level them, while leveling mortar is a type of mortar that can be used to fill in any gaps or uneven areas.
Installing New Tiles
Now that the subfloor is prepared, it’s time to install the new tiles. There are two common methods for installing tiles: thin-set mortar and mastic. Thin-set mortar is a cement-based adhesive that is mixed with water and applied to the subfloor with a notched trowel.
Mastic is a pre-mixed adhesive that is applied directly to the subfloor with a trowel.
Once the adhesive is applied, the tiles are set in place and pressed down firmly. It’s important to use spacers to ensure that the tiles are evenly spaced. Once the tiles are set, they need to be grouted. Grout is a cement-based material that is mixed with water and applied to the joints between the tiles.
The grout helps to seal the joints and prevent water from seeping through.
Cutting and Fitting Tiles
When installing tiles, it’s often necessary to cut tiles to fit around obstacles, such as toilets and vanities. There are a few different ways to cut tiles, but the most common method is to use a wet saw. A wet saw uses a water-cooled blade to cut through the tile, which helps to prevent the tile from chipping or breaking.
Once the tiles are cut, they need to be fitted into place. It’s important to use spacers to ensure that the tiles are evenly spaced. Once the tiles are fitted, they need to be grouted.
Grouting and Finishing
Grouting and finishing are essential steps in completing a bathroom floor tile installation. Grout is a mixture of cement, sand, and water that fills the gaps between tiles, preventing moisture and dirt from penetrating the subfloor. Sealants are applied over the grout to further protect it from moisture and stains.
Mixing and Applying Grout
To mix grout, follow the manufacturer’s instructions. Generally, you will need to add water to the powder until you achieve a smooth, spreadable consistency. Apply the grout to the tile joints using a grout float, pressing it into the gaps firmly.
Remove any excess grout from the surface of the tiles with a damp sponge.
Tips for a Professional-Looking Grout Job
- Use a grout color that complements the tiles.
- Apply the grout evenly and consistently throughout the joints.
- Remove excess grout immediately to prevent staining.
- Allow the grout to cure completely before sealing.
Types of Sealants and Application
There are various types of sealants available, including acrylic, silicone, and epoxy. Choose a sealant that is suitable for the type of tile and grout you have installed. Apply the sealant to the grout joints using a sealant gun, following the manufacturer’s instructions.
Allow the sealant to cure completely before using the bathroom.
Closure
Congratulations! You have now successfully removed and replaced your bathroom floor tiles. By following the steps Artikeld in this guide, you have not only saved money but also gained valuable experience in home improvement. Your new bathroom floor will not only enhance the aesthetics of your space but also increase its functionality and durability.
Enjoy your beautiful new bathroom!


