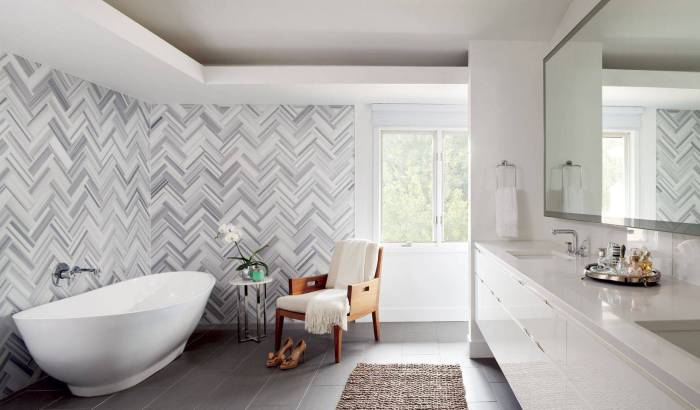
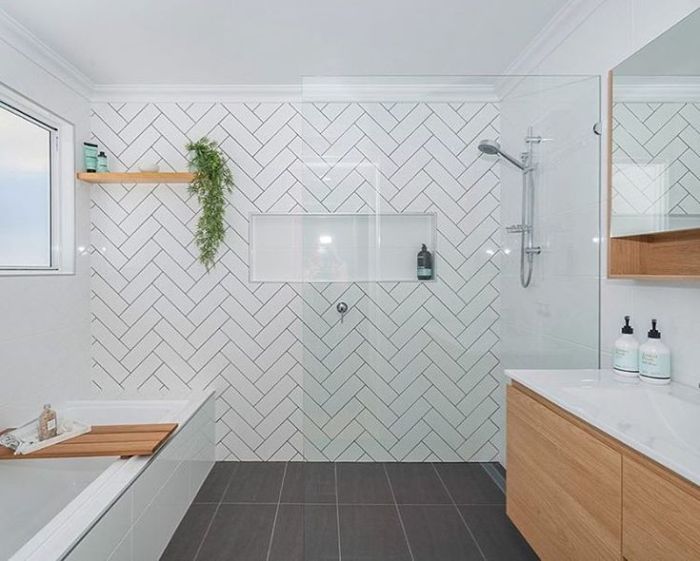
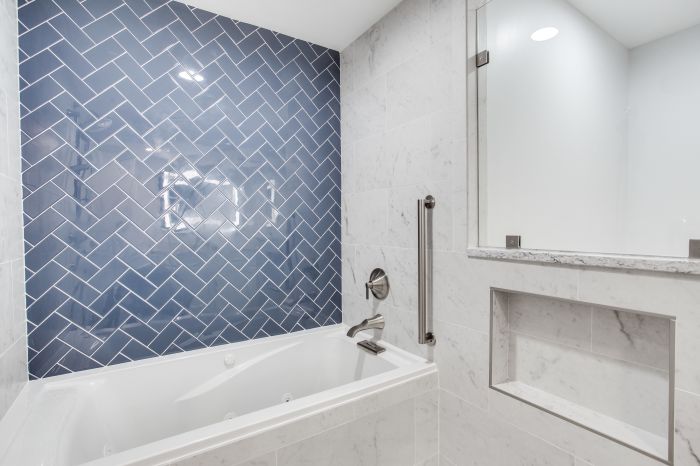
Step into a realm of timeless elegance with herringbone pattern tiles, a classic design element that adds a touch of sophistication to any bathroom. From traditional to contemporary spaces, these versatile tiles seamlessly blend with various aesthetics, offering endless possibilities for creating a stylish and inviting retreat.
Herringbone tiles derive their charm from their distinctive zigzag pattern, reminiscent of the interwoven bones of a herring fish. This intricate arrangement creates a captivating visual effect that adds depth and dimension to bathroom walls. Whether you prefer subtle or bold accents, herringbone tiles can transform your space into a sanctuary of style.
Introduction to Herringbone Pattern Tiles
Herringbone patterns have captivated the world of design for centuries, exuding a timeless elegance that transcends fleeting trends. In the realm of bathroom design, herringbone tiles reign supreme, offering a versatile canvas for both traditional and contemporary aesthetics.
Herringbone Patterns: A Timeless Classic
The herringbone pattern, characterized by its distinctive zig-zag formation, draws inspiration from the interlocking bones of a fish’s skeleton. This geometric motif has adorned everything from textiles to architecture, leaving an enduring legacy in the annals of design. Its timeless appeal stems from its inherent balance and visual interest, creating a dynamic and eye-catching effect.
Versatility in Bathroom Design
The versatility of herringbone tiles lies in their ability to adapt seamlessly to a wide range of bathroom styles. In traditional settings, they evoke a sense of grandeur and sophistication, reminiscent of classic European bathrooms. When paired with marble or stone tiles, herringbone patterns add an air of opulence and timeless charm.
In contemporary bathrooms, herringbone tiles take on a more modern persona. They can be combined with sleek, minimalist fixtures and finishes to create a clean and sophisticated look. By experimenting with different tile sizes, colors, and grout lines, designers can tailor herringbone patterns to suit any bathroom aesthetic.
Design Considerations for Herringbone Wall Tiles
The size and shape of the tiles you choose can have a significant impact on the overall look of your bathroom. Smaller tiles will create a more intricate and detailed pattern, while larger tiles will create a more sleek and modern look.
The shape of the tiles can also affect the overall look, with rectangular tiles creating a more traditional look and square tiles creating a more contemporary look.
Grout Color and Width
The color and width of the grout can also be used to enhance or contrast the herringbone pattern. A dark grout color will create a more dramatic look, while a light grout color will create a more subtle look. The width of the grout can also affect the overall look, with a wider grout line creating a more rustic look and a narrower grout line creating a more modern look.
Complementary Fixtures and Finishes
Herringbone tiles can be paired with a variety of fixtures and finishes to create a unique and stylish look. Some popular choices include:
- Brass fixtures: Brass fixtures can add a touch of warmth and sophistication to a bathroom with herringbone tiles.
- Marble countertops: Marble countertops can add a touch of luxury to a bathroom with herringbone tiles.
- Wood accents: Wood accents can add a touch of warmth and natural beauty to a bathroom with herringbone tiles.
Installation Techniques for Herringbone Tiles
Installing herringbone tiles requires meticulous attention to detail to achieve a professional-looking finish. The process involves several key steps, including substrate preparation, tile layout, and proper use of spacers and levelers.
Before starting the installation, it’s crucial to ensure that the substrate is level, clean, and free of debris. This provides a stable base for the tiles to adhere to. Next, a tile layout should be created to determine the placement of the tiles and ensure a visually pleasing pattern.
Substrate Preparation
- Inspect the substrate for any imperfections, such as unevenness or cracks, and address them accordingly.
- Clean the substrate thoroughly to remove dirt, dust, or any other contaminants that may affect the adhesion of the tiles.
- Apply a bonding agent or primer to the substrate to enhance the adhesion between the tiles and the substrate.
Tile Layout
- Determine the center point of the wall and create a vertical guideline using a chalk line or laser level.
- Start laying the tiles from the center point, working outwards in a herringbone pattern.
- Use spacers to maintain consistent spacing between the tiles and ensure a uniform appearance.
Spacers and Levelers
- Spacers help maintain the desired spacing between the tiles, preventing them from being too close or too far apart.
- Levelers ensure that the tiles are laid evenly, preventing uneven surfaces or lippage.
- Properly installed spacers and levelers contribute to a professional-looking finish.
Cutting Tiles
- When encountering obstacles or edges, tiles need to be cut to fit seamlessly into the pattern.
- Use a tile cutter or wet saw to make precise cuts, ensuring that the edges are smooth and clean.
- Dry-fit the cut tiles before applying adhesive to ensure proper fit and alignment.
Maintenance and Care of Herringbone Tiles
Maintaining herringbone tiles is crucial to preserve their beauty and longevity. Regular cleaning and proper care techniques ensure the tiles remain pristine and elegant.
Cleaning Techniques
Regular cleaning with a damp microfiber cloth or sponge is sufficient for everyday maintenance. Avoid harsh chemicals or abrasive cleaners, as these can damage the tile surface. For deeper cleaning, use a mild soap solution and a soft-bristled brush. Rinse thoroughly with clean water and dry with a clean cloth.
Sealants and Protective Coatings
Applying a sealant to herringbone tiles helps protect them from stains and moisture. Sealants create a barrier that repels liquids and dirt, making the tiles easier to clean. Re-apply the sealant every few years to maintain its effectiveness.
Stain Prevention
To prevent stains, wipe up spills immediately. Use a damp cloth or paper towel to absorb the spill. For stubborn stains, consult a professional tile cleaner.
Scratch Prevention
Avoid placing heavy objects directly on herringbone tiles. Use coasters under cups and vases to prevent scratches. If scratches do occur, they can be repaired by a professional tile installer.
Last Recap
Embark on a journey of creativity with herringbone pattern tiles. Their versatility extends beyond traditional wall applications, allowing you to explore innovative designs for shower floors, accent walls, and decorative niches. Embrace the endless possibilities of geometric patterns and unique layouts to create a bathroom that truly reflects your personal style.
Remember, the key to maintaining the beauty and longevity of your herringbone tiles lies in proper cleaning and care. With these tiles as your canvas, let your imagination soar and transform your bathroom into a timeless masterpiece.


